Let Us Find You A Professional
Concrator For Your Project
We Have Gathered All The Information For You
16 Ways To Redesign Your Concrete Flooring
Perhaps you’re not sure what options are out there to choose from. We’re here to help with these 16 unique ways to redesign your concrete flooring.
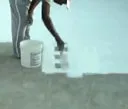
Concrete Floor Paint

The quickest way to do painted concrete is to go with a single color. However, if that’s not exciting enough for your space. You can also utilize stencils to create one-of-a-kind, two-tone patterns on your concrete flooring as well!

How Long Does It Last?
Now you may be wondering how long your floor paint will last. This depends on a couple of factors like what type of room it is and how much traffic, foot or vehicle, will be on it. In most cases, a painted concrete floor will last one to two years before it needs to be retouched
or repainted altogether.

Where Should I Apply This?
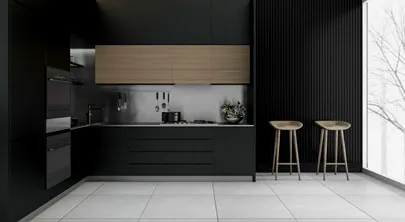
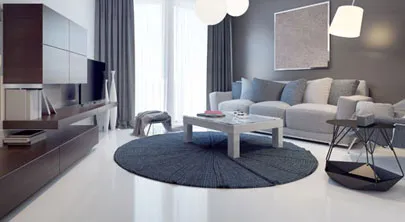
Painted concrete can look great in any room in your home or facility. Living rooms, kitchens, garages, and basements are all excellent choices for concrete floor paint.
Painted concrete is quickly becoming more popular for use inside among homeowners across America.

How Much Does It Cost?
For a do-it-yourself project, painting your concrete flooring costs anywhere from $0.69 to $1.13 per square foot. By throwing labor into the mix with a contractor, it will run you anywhere from $1.51 to $3.11 per square foot.

DIY Do-able or Hire a Professional?
Out of all the options that are out there for concrete floor remodels, painting concrete is the most DIY do-able. The process doesn’t require a huge amount of tools, other than what you need for any repairs and to rough up the face of the floor for better adhesion. Hiring a professional is always a good idea, however, because you can count on high-quality work going into your floor. Overall, though, this project is DIY do-able.
Check out
Pros and Cons

Floor Paint Pros:
- A fast, simple method to beautify concrete flooring.
- One of the most affordable projects for concrete.
- Hides imperfections, such as hard-to-remove stains.
- It can be easily used in virtually any room that has a concrete floor.

Floor Paint Cons:
- It doesn’t last as long as other concrete floor coatings.
- Concrete floor paint doesn’t offer as much customization.
- Moisture can cause the paint to blister up.
- If used in an area exposed to sunlight, concrete floor paint can fade.
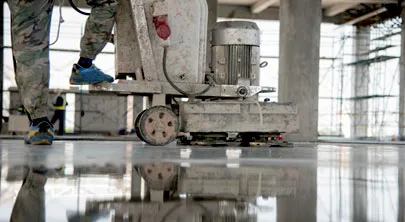
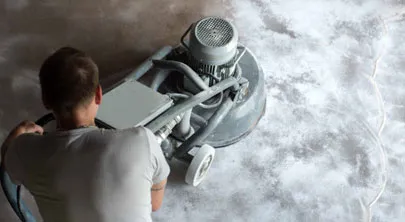
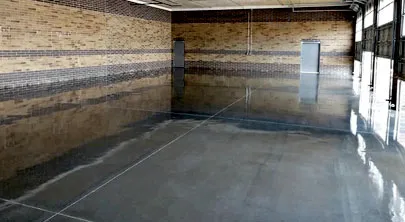
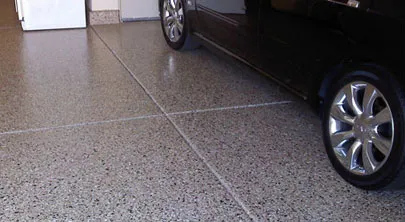
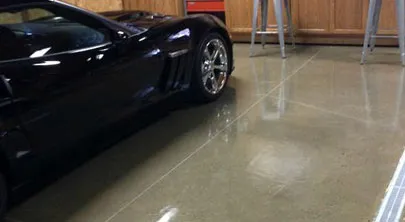
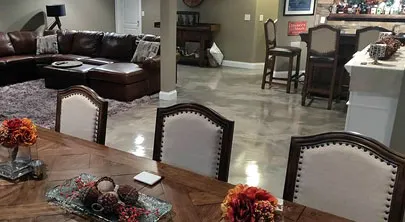
Polished Concrete Flooring

A polished concrete floor does not require any elements other than a concrete surface. The process is much more affordable than other methods of concrete flooring because of that fact. Polished concrete is notably durable, making it considerably more resistant to high foot traffic and vehicle traffic. Once sealed it also creates a stain-resistant and non-slip surface. This makes polished concrete less vulnerable to damage and it, consequently, lasts longer.
Polished concrete doesn’t have to be as simple as just polishing it. There are several polishing levels, finishes, and colors available to make it your own. You can have your polished concrete stained different colors, polished to finish of satin to mirror-like, and you can even have design lines engraved on your floor.
How Long Does It Last?
Polished concrete flooring can last for over 15 years, but there are several diverse factors that can affect the longevity of your floor.
Conditions such as your floor’s environment, age, and state prior to polishing all play prominent roles in
how long it will last.

How Much Does It Cost?
If you choose to do the job yourself, you can expect to spend around $0.60 to $0.73 per square foot. That is also factoring in an allowance for equipment rentals. If you choose to look into concrete polishing contractors, expect to pay $2.00 – $6.00 per square foot and most contractors will increase or decrease the price based on project size! You can expect to pay an inflated cost for projects under 300 sqft.
DIY Do-able or Hire a Professional?
However, if you’re not interested in trial and error with the sheen of your concrete flooring, you should consider looking into polished concrete contractors to do the job professionally and to your liking.

Where Should I Apply This?
From your living room to a factory floor, polished concrete makes a remarkable floor for any circumstance.
Check out
Pros and Cons
Polished Floor Pros:
- A robust and durable flooring system.
- The most affordable of concrete flooring systems.
- Polished concrete only requires light maintenance.
- It creates a mirror-like finish on your floor.
Polished Floor Cons:
- Uncomfortable to stand on for extended periods of time.
- Polished concrete can be cold without a heating system.
- The floor will have less give, which means anything you drop could possibly break.
Concrete Sealers


Acrylics
- Acrylics come in two classes, solvents and water-based. Acrylics are swift and straightforward to administer.
- They are also most affordable concrete seal coat to use.
- These sealers are resistant to sunlight and prevent the concrete from fading over time.
Polyurethanes
- Polyurethanes also come in two forms, solvent and water-based. Comparable to acrylic sealers, polyurethanes have a denser coating, though.
- They offer exceptional protection against abrasives and chemicals. Nevertheless, you have to allow the sealer to completely dry before exposing it to water.


Penetrating Sealers
- Penetrating sealers have an advanced formula that quickly reacts to the capillaries of your concrete flooring on a chemical level.
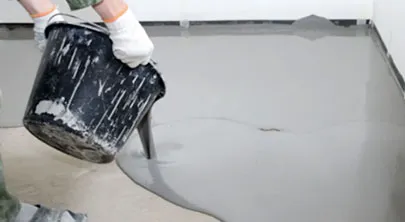
Underlays are another method for sealing concrete. Underlayments are a thin topping intended to level out and smooth flaws in the concrete flooring. They lay as a level foundation prior to the installation of other floor coatings. An underlay resurfaces cracked, uneven concrete and creates a seal to diminish the risk of moisture absorption.
How Long Does It Last?
Where Should I Apply This?
How Much Does It Cost?
DIY Do-able or Hire a Professional?
If you want to add a tint or design to your sealed concrete, however, you may want to consider hiring a professional to handle the more intricate steps.
Check out
Pros and Cons

Polished Floor Pros:
- You can enhance your concrete flooring’s color and add a shine to it with concrete sealers.
- Concrete sealers repel moisture.
- Your concrete floor’s lifespan will be significantly increased by a sealer.

Polished Floor Cons:
- When sealed concrete is made wet, the surface can become slippery.
- Sealer should be reapplied every two years to maintain protection.
- One application of sealer is an affordable option.
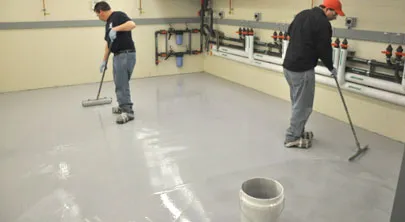
Concrete Epoxy Coating

There are plenty of types, colors, and finishes to choose from with an epoxy floor coating. As for color, you can have your concrete flooring coated in epoxy of whatever color you can think of!

Decorative Flake Epoxy
- Sometimes referred to as decorative vinyl color chips, flakes are mixed in with the epoxy to beautify the aesthetic features of seamless epoxy floor coatings. The flakes come in a myriad of sizes to change the color contrast level you’d like in your concrete flooring.
Smooth Epoxy
- Smooth epoxy flooring creates a seamless, glossy finish that can be created in whatever color you desire. You can apply more than one color to add a pattern to the floor design while retaining the smooth, nontextured finish.


Swirled Epoxy
- This finish is often utilized in metallic epoxy flooring. The swirl finish is created by mixing a powdered additive into the epoxy that creates a multi-layered effect as the epoxy cures. One-of-a-kind designs are a key benefit of this finish.
100% Solid Epoxy
- The only drawback is that it cures incredibly fast, sometimes faster than it can be applied. Consider hiring a professional if you go with this epoxy floor coating.
- Epoxy flooring is resistant to abrasions, chemicals, and stains. 100% solid epoxy is one of the most durable floor coatings there is. A properly installed 100% solid epoxy floor can last for 20 years or more.
- 100% solid epoxy does not have water or solvents that evaporate while curing. It retains all of its thickness and body after cure. Hence where it gets its name. There are no harmful vapors experienced like with a solvent-based epoxy.


DIY Kits
- DIY epoxy flooring kits are available in a wide range of types and colors. Most of the higher quality kits contain everything you need to apply an epoxy floor coating in your home or facility.
- These kits typically consist of primer, epoxy, accessories, and a topcoat. A fair amount of kits even include flakes to use, or not, in your epoxy floor coating. A DIY kit can take a lot of the guesswork out of buying everything needed to redesign your concrete flooring.
Water-Based Epoxy
- Water-based epoxy is a two-component epoxy floor coating that will mimic the physical properties of solvent-based epoxies, but in a water-reducible formula.
- This epoxy floor coating should be considered for all interior concrete sealing applications where superior durability is required and solvent odors and flammability are not admissible.
- Water-based epoxy exhibits exceptional penetrating qualities that strengthen the concrete. At the same time, it produces a surface coating that will promote noticeable water and chemical resistance. As well as resistance to acids, solvents, oils, gasoline and a combination of impact and abrasion resistance.

Where Should I Apply This?
Concrete epoxy floor coatings are perfect for use in residential, commercial, and industrial settings. If you want to spruce up your home with a new floor design, or if your facility could use an upgrade, epoxy flooring can make for a great selection with its durability and long lifespan. As its USDA approved, epoxy floor coating can even be used in sensitive settings where floors need to be disinfected routinely.
How Much Does It Cost?
Factors that determine the cost of an epoxy floor coating are what type of epoxy used, colors, and design.
On average, a do-it-yourselfer will pay anywhere from $2 to $5 per square foot. Adding a contractor to the mix will make it around $3 to $12 per square foot, accounting for labor, often times with a warranty provided in case anything is to go wrong.
Check out
Pros and Cons
Epoxy Flooring Pros:
- Epoxy flooring is a remarkably durable option for concrete flooring. Epoxy floors require true artistic ability and knowledge.
- Epoxy floor coating lasts longer than most any other flooring system.
- It’s highly resistant to just about everything. From chemicals and abrasions to heat and water, it’s difficult to damage an epoxy floor.
- The variety available for epoxy floor designs is unmatched. If you can think of it, epoxy floor will most likely be able to do it.
Epoxy Flooring Cons:
- The application of epoxy is a time-consuming process due to the time needed to allow it to cure, which is roughly a few days.
- If you decide to change the design or color of your flooring, removing an existing epoxy floor can be a costly project to undertake.
- In order to properly maintain an epoxy floor, you will need special cleaners to keep it looking its best.
- Epoxy flooring needs to be installed exactly as specified. If not done properly, it will not last as long and will not be as durable as it should.

DIY Do-able or Hire a Professional?
If it’s not installed exactly the right way, it will not perform as it should.
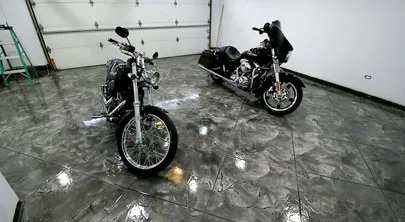
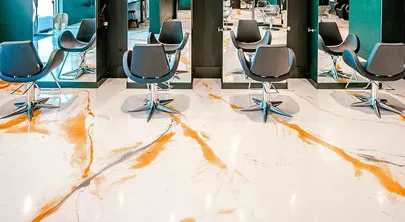
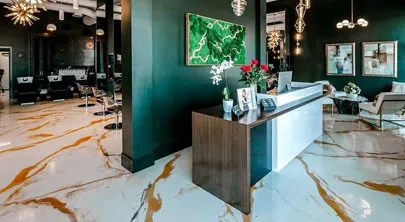
Concrete Metallic Epoxy Coating

There are many popular colors to choose from for metallic epoxy coatings. As with regular epoxy, you can have just about any color combination you can dream up with metallic epoxy. The key to using metallic epoxy is picking colors that go well with one another. Be it for a natural scene or for vibrant color contrast, you can choose what you want with metallic epoxy flooring.
Don’t be afraid to get creative with a metallic epoxy floor. The possibilities are truly endless because of the unique application process. Each floor made with metallic epoxy is essentially a one-of-a-kind design. With every application, the metallic powder flows through the epoxy to create this signature look. As mentioned above, you can go with vibrant color contrasts or design a floor that mimics lively scenes from nature. Every floor is what you make it.
You may be wondering what’s different about how metallic epoxy is done. It forms a distinct, multi-layered epoxy floor coating that incorporates the application of a metallic additive mixed into a clear epoxy coating. This metallic powder continues to run through the epoxy as it cures producing the unique design.
How Much Does It Cost?
When calculating the price of metallic epoxy flooring, you’ll need to consider the colors and designs going into the floor. Design is more focused on contractor pricing. If you choose to take on this project yourself, it can cost anywhere from $2.00 to $7.00 per square foot. When hiring a professional to do the install, the pricing can be anywhere from $7.00 to $12.00 per square foot. Keep in mind, when hiring a professional contractor they will often offer you a warranty too.
DIY Do-able or Hire a Professional?
This is a project that can be done on your own. There are plenty of DIY kits available for purchase.
However, because of the intricate designs associated with metallic epoxy or if you have a specific idea in mind, you should consider hiring a professional on this one. A professional contractor has experience with metallic
epoxy flooring.
Check out
Pros and Cons
Metallic Epoxy Pros:
- The ability to create a design that is unique creativity.
- Metallic epoxy coatings can be used to create a seamless flooring system that is easy to clean and maintain.
- A metallic epoxy floor is durable and can last over 20 years if properly maintained.

Metallic Epoxy Cons:
- Metallic epoxy is a bit costlier than other epoxy coatings.
- If you change your mind years down the road, it can be expensive to remove and replace a metallic epoxy floor.
- Due to the nature of the unique design, it can be a difficult do-it-yourself project.
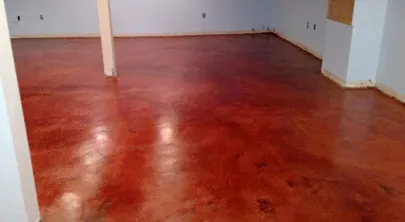
Stained Concrete


Reactive Stains
- An acid-based concrete stain contains metallic salts that react with the concrete’s lime content.
- Once the chemical reaction takes place, the stain develops a permanent bond with the concrete and will not chip off or peel up.
Nonreactive Stains
- Their color effects tend to be more opaque and uniform than reactive stains.
- These water-based acrylic stains don’t rely on a chemical reaction to stain concrete flooring. Instead, they work more like paint by transferring their pigments to the pores of the concrete.

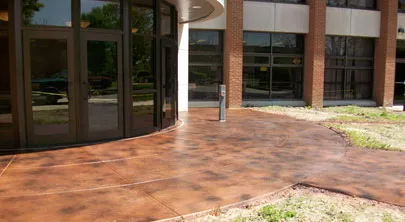
Where Should I Apply This?
You can stain concrete floors indoors or outdoors. The process doesn’t change either way you go. The only added steps when staining indoor concrete would be removing furniture and making sure the area is well ventilated, especially when using acid-based stains. Stained concrete can be an elegant look for any room, inside or out.
How Much Does It Cost?
The price of staining concrete flooring varies dependant on color and whether you choose to use a reactive or nonreactive stain. If you want to do it yourself, the average cost is anywhere between $1.30 to $1.60 per square foot. If you’re hiring a professional, it will cost between $3.67 to $4.34 per square foot on average. Projects under 300 sq ft may cost more depending on the contractor you are using.
Check out
Pros and Cons
Stained Concrete Pros:
- Stained concrete is a cost-efficient way to beautify your concrete flooring.
- Concrete stains come in a variety of colors to suit your needs.
- It can be used in combination with other concrete floor coatings.
Stained Concrete Cons:
- Concrete staining is purely for aesthetic purposes and does not enhance the performance of the floor.
- Concrete stains do not cover imperfections, rather they can highlight them in some cases.
- Depending on the desired effect, it may not be a great DIY project.
DIY Do-able or Hire a Professional?
If you want an effect other than merely a solid-color stain, such as marbling, you should consider hiring a professional contractor to apply the stain.
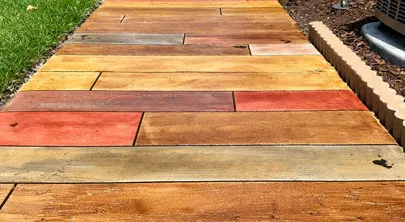
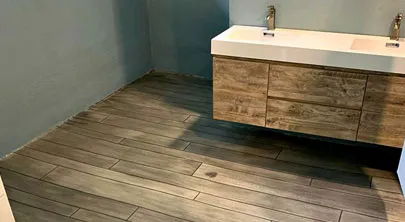
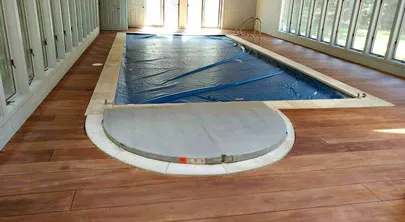
Wood Stamped Concrete

Wood stamped concrete flooring offers a large variety of choices in styles and colors. You can have your concrete resemble various types of hardwood flooring, from 3-inch planks to 6 inches. You can make it look like the rugged planks of a bridge or even the cut ends of blocks of wood.
Of course, where would variety be without color? You have no worry in that you can only have this one shade of woody brown. Whatever type of wood you want your concrete to resemble, you can have the color match as well.
Traditional Concrete Vs. Rustic Wood Concrete
Both forms of concrete flooring have their respective good and bad qualities. With a traditional concrete floor, you can have a seamless floor design encompassing many different colors and finishes.
However, if you’re looking for a more warm, home-like appearance for your concrete flooring, rustic wood concrete is fast-becoming one of the most popular floor designs available!
How Much Does It Cost?
Installing wood stamped concrete is going to be a bit more expensive than having a flat concrete slab poured. The price can vary depending on the intricacy of the wood design as well.
If you’re willing to undertake this project yourself, the cost will be anywhere from $3.63 to $4.49 per square foot. If you need to have this done by a professional the price will be anywhere from $8.90 to $20.58 per square foot.
Check out
Pros and Cons
Wood Stamped Concrete Pros:
- Wood stamped concrete is a more durable, long-lasting alternative to actual hardwood flooring.
- The variety in choices doesn’t change the cost as drastically as real wood does.
- As wood stamped concrete is a continuous surface, maintenance is easier than having individual planks of wood.
Wood Stamped Concrete Cons:
- The possibility of cracking could potentially have negative effects on the overall pattern of your flooring.
- The cost of wood stamped concrete is usually higher than having real hardwood installed.
- If the floor does suffer damage and needs to be repaired, matching colors can be difficult and new concrete typically has a different shade.

DIY Do-able or Hire a Professional?
Stamping concrete is a fast-paced process that requires the stamps to be applied before the concrete can set up. With the workload and time constraints involved in pouring and stamping concrete, this one is probably best left to the professionals.
Textured Epoxy Concrete Coatings

The decorative flakes are available in practically every color there is, including fluorescents and glow-in-the-dark colors! The standard flake size is 1/4 inch, but they can range from 1/16 inch to 3/4 inch. You also have a choice in the density of flakes in your flooring. You can have a light sprinkle to every square inch covered in flakes.
Some of the uses for having a textured epoxy floor are that a textured surface can provide traction when it’s wet, which can lessen safety hazards and provide slip-resistance. It can also help keep equipment and stored items in place.
Where Should I Apply This?
Textured epoxy floor coatings can be applied anywhere indoors or outdoors. Specifically handy in commercial and industrial settings, as it provides slip-resistance.
Not to be dissuaded from residential use, decorative flakes can create a stunning design on any floor.
How Much Does It Cost?
On average for a do-it-yourselfer, the cost will be anywhere from $3.45 to $4.45 per square foot. If you choose to hire a professional to do the install, it will be anywhere from $5.29 to $8.94 per square foot on average. With nearly every contractor you can expect to have a warranty on your flooring as well.
Check out
Pros and Cons
Textured Epoxy Pros:
- Textured epoxy flooring provides a non-slip surface to your floors.
- This flooring is durable and long-lasting.
- The texture adds depth to the floor, creating a beautiful aesthetic in any room.
Textured Epoxy Cons:
- Depending on quality, some colored flakes may fade with exposure to the sun.
- Cracked surface the crack will transfer to epoxy floor.
- The shape of the flakes is random, so you only have control over the color and density.

DIY Do-able or Hire a Professional?
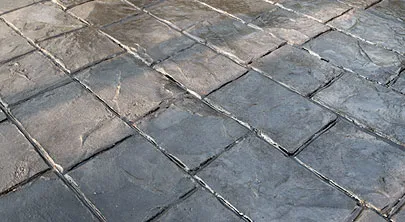
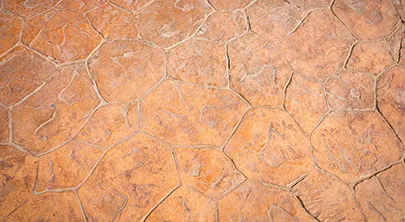
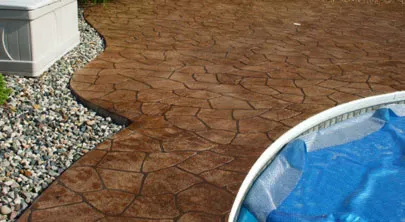
Faux Stone Stamped Concrete

There is an extensive variety of faux stone stamped concrete available. Contractors will have their own stamps based upon what is popular in your area, although you can have any pattern ordered to stamp your concrete.
- Cobblestone
- Slate Patterns
- Random Stone
- Brick
- European Fan
- Herringbone Brick
- Rough Stone
- Sanded Slate
- Athens Stone

How is it Done?
After that, a release agent will also be applied to impart subtle color contrast and prevent the stamping mats from sticking to the concrete flooring.
Now that the entire concrete floor has been stamped, any remaining hardener or release agent needs to be washed off so the curing compound can be applied. Then control joints can be cut into the concrete to provide stress relief and the concrete flooring can be sealed.
How Much Does It Cost?
Much the same as wood stamped concrete, the price can fluctuate depending on the intricacy of the faux stone design as well as the colors imparted. If you’re willing to undertake this project yourself, the cost will be anywhere from $3.63 to $4.49 per square foot. If you need to have this done by a professional the price will be anywhere from $8.90 to $20.58 per square foot on average.
DIY Do-able or Hire a Professional?
Stamping concrete can be a difficult project to attempt yourself. It is DIY do-able if you have the knowledge, tools, and helping hands.
You can’t do this project all alone though. Due to having to the time constraints involved with stamping concrete, you should consider hiring a professional to complete this project.
Colored Concrete

Another method of integral coloring is by mixing concrete dyes into the mix. Similar to colored pigments, the dye coats the concrete particles changing the color of the entire concrete mix. Dyes can be used to achieve more vibrant color hues like reds, yellows, and blues.
You can also create colored concrete with color hardeners. These hardeners are different than the previous two methods because they do not color the entirety of the concrete, but instead color the surface of the concrete alone. The color hardener is applied as a powder or liquid onto the concrete after it has been poured. Color hardeners have been known to produce bolder colors because the color is all concentrated on the surface itself.
Check out
Pros and Cons
Colored Concrete Pros:
- Achieve any unique color desired using one of the methods described above.
- Coloring concrete flooring is a relatively easy process.
- Coloring methods for concrete can be used in junction with almost any type of sealer and stain.
Colored Concrete Cons:
- Unless you’re using color hardener, coloring concrete doesn’t strengthen or benefit the concrete.
- If your concrete chips or has a defect, it is more difficult to repair because of needing to match the color exactly.
- If using concrete dye, dyes are not always UV stable and can fade when exposed to sunlight.

DIY Do-able or Hire a Professional?
Although, if you doubt your ability to pour concrete, you should hire a professional contractor to complete this task.
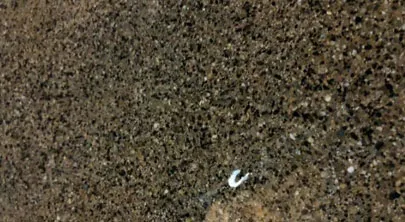
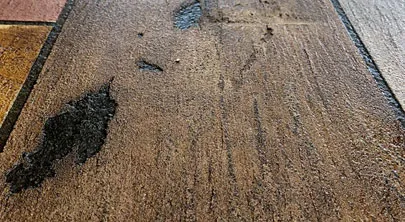
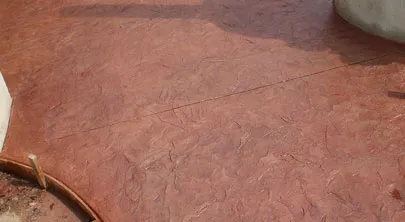
Distressed And Sealed Concrete

Distressing is seen as a refinishing technique although it is the opposite of finishing in a traditional sense. In distressing, the floor’s finish is intentionally damaged or manipulated to look less than perfect.
Another way to achieve the distressed look is by embracing your old, stained, possibly chipped or cracked concrete flooring. If you’re going for the rustic, weathered look, there’s no need to invest the time or money in repairing your concrete. You can simply seal everything in and leave the imperfections. If the theme of your home is rustic or industrial, distressed concrete flooring can be the perfectly imperfect addition to complete the look!
Check out
Pros and Cons

Distressed & Sealed Concrete Pros:
- Distressed aesthetics are immensely popular right now.
- Sealing in already distressed concrete can save money on repairs.
- It creates a rustic look for your home or facility.
Distressed & Sealed Concrete Cons:
- In not repairing the imperfections, you risk the possibility of cracks or chips becoming worse.
- In some cases, a sealer will delaminate from concrete that is damaged.
- Distressed concrete does not offer any added strength or durability to your concrete flooring.

DIY Do-able or Hire a Professional?
Because of the nature of distressing concrete, you may want to consider hiring a professional anyways though. A professional can take a look at the existing damage and determine if it will compromise the structural integrity of your floor before sealing it in.
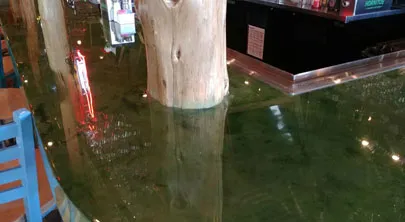
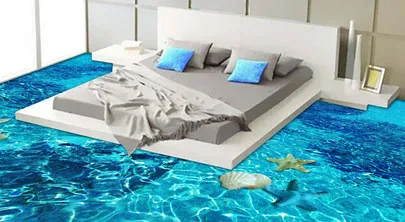
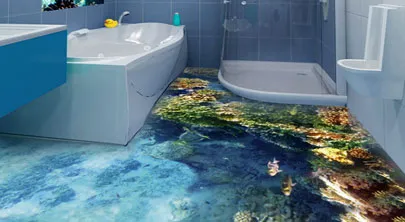
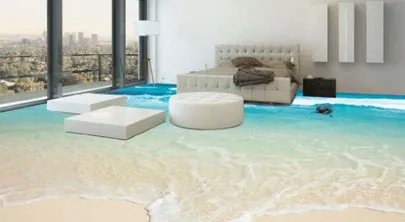
3D Epoxy Floor Coatings

How is it Done?
This flooring is not like a sticker or vinyl laminate that is on the surface of the floor. 3D epoxy allows the image to have depth, giving it the 3D appearance.
How Much Does It Cost?
The 3D epoxy flooring price depends on several factors such as the condition of the concrete, total square footage, and image complexity. The durability and lifespan are also two major factors to determine 3D epoxy flooring costs. High-grade epoxy floor materials will be more expensive.
On average, 3D epoxy flooring installation costs anywhere from $10 to $20 per square foot. An intricate design will entail more work, therefore, driving up the cost of installation. The smaller the area of the floor, the more expensive the cost will be.
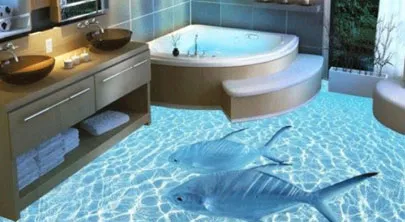
Where Should I Apply This?
3D epoxy floors can be applied anywhere in your home or facility.
They’re great for rooms that have a specific theme as you can simply select an image that falls under the room’s theme.
Check out
Pros and Cons
3D Epoxy Floor Coatings Pros:
- The most meaningful benefit of an epoxy 3D floor is the stunning visual effect produced.
- A 3D epoxy flooring system is extremely safe. They are resistant to fire, significantly hygienic, and resistant to various chemicals.
- Epoxy is remarkably durable and can last over 20 years if properly maintained.
3D Epoxy Floor Coatings Cons
- This type of epoxy flooring is difficult to install. It’s a complex process that takes time to fully cure.
- 3D epoxy floors are generally more expensive than other forms of concrete flooring.
- These floors are as cold as tile or bare concrete. Be mindful of this when choosing where to install.

DIY Do-able or Hire a Professional?
For 3D epoxy flooring, it’s best to hire a contractor to install it.
Bare Concrete

This is also a great idea for those that are undecided about what type of concrete flooring to install but need a flooring system immediately. You can simply keep your bare concrete until your ready for a new design. If this is for new construction, you’ll need to have concrete poured to create the flooring system.
How Much Does It Cost?
When calculating the cost of pouring concrete you’ll need to account for the price of the cement, tools, and any necessary equipment rentals.
If you have experience working concrete and want to do this yourself, this project will cost anywhere from $2.88 to $3.63 per square foot. To have a professional pour your concrete floor the price will be anywhere from $8.02 to $9.85 per square foot.
Bare Concrete Professional
This type of install can be DIY do-able with some helping hands, especially if you have experience working with concrete.
However, pouring a concrete slab is a major project and could use the help of a professional to ensure everything is up to code.
Concrete Flooring Stencils

There is a myriad of standard stencils to choose from. If you can’t find the design you had in mind, you also have the option to have a custom stencil made to suit your needs.
DIY Do-able or Hire a Professional?
This project is definitely DIY do-able. All you need are the materials mentioned earlier for painted or stained concrete and your stencils. As always, if you have a specific look in mind, it may be in your best interest to hire a professional to assure you achieve the look you want.
How Much Does It Cost?
Stenciled concrete can range from $13 to $19 per square foot. It depends on the dyes, design of stencils or type of stencils and the densifiers used.

How is it Done?
Once dried, the stencil adheres to the concrete surface and then the paint or stain is applied over it. Once the coating is dry, the stencil is removed to reveal your pattern!
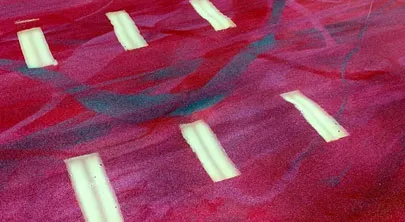
Heat Repellent Flooring Coatings

A Sundek concrete coating is designed to stay cooler than standard grey concrete. These exclusive systems offer various colors, textures, and designs that can be added to many old or new surfaces. Used on floors, driveways, pool decks, commercial areas, retail spaces, and garages to name a few. Sundek’s concrete coatings have been proven to resist high traffic locations.
How is it Done?
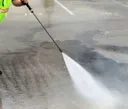
Prepare & Repair
Etch or grind the concrete surface to make it porous. Fix cracks or other existing damage.
Apply Overlay
Clean & Prime
Add Patterns & Textures
This is completed using hand-trowels, rakes, stamps and other specialty tools.
Mix The Product
Cure & Seal
How Much Does It Cost?
Nationally, the average cost for concrete resurfacing is $3 to $10 per square foot, depending on the condition of the original concrete and your local labor costs.
The new concrete must also be sealed, which costs $20 to $80 per gallon.
DIY Do-able or Hire a Professional?
Sundek provides thorough instructions for most of their products, so this can be DIY do-able. Although this is yet another large project to do alone.
Therefore it’s recommended to hire a professional to get the job done correctly.
Check out
Pros and Cons
Heat Repellent Floor Coatings Pros:
- Improve the appearance of your outdoor concrete.
- Cools off what would normally be hot concrete.
- Adds years to the life of your concrete.
Heat Repellent Floor Coatings Cons:
- It can’t fix already crumbling concrete.
- This can’t be done to already coated concrete systems.
- It can be a costly project to undertake, depending on the condition of your concrete.
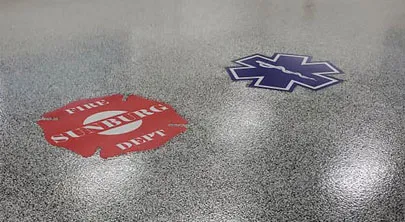
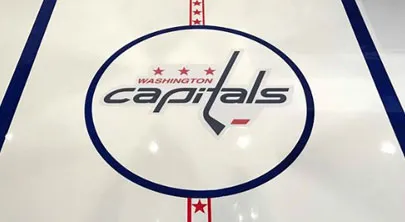
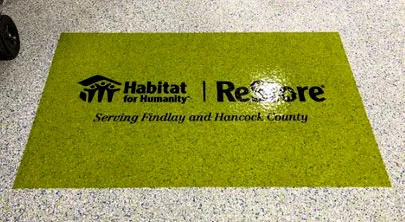
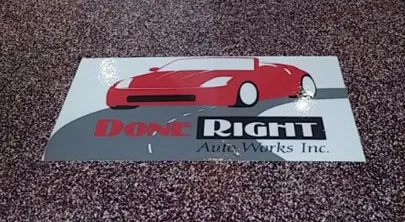
Custom Graphics & Logos

How is it Done?

How Much Does It Cost?
The factors that go into adding a graphic or logo to an epoxy floor are what type of epoxy flooring you choose, what size image, and how many colors are used. On average, incorporating a graphic or logo into epoxy flooring installation costs anywhere from $10 to $20 per square foot on average.
DIY Do-able or Hire a Professional?
This type of project is recommended to be done by a professional. This is a delicate, complex process that requires significant skill.
If you want your logo or graphic to last as long as possible and look its best, hire a professional.
Final Thoughts!
Now you have every detail for all the different projects available for redesigning your concrete flooring. Best of luck to those of you that choose our DIY approved options and to those that hire professionals to install your flooring. There may be an overabundance of options available, but with this list, you should be able to find the best flooring for your needs.